
How To View Pictures
If you haven't done so, click on the arrow to the left of to the "View Pictures" label. This opens the list of pictures as shown in the figure below.
Viewing Pictures
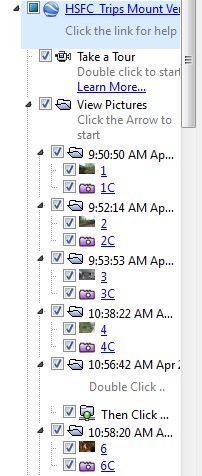
Each picture folder in the list is labeled with the local time it was taken. The first item inside the folder is a photo icon and a link that contains the picture sequence number. Click on the link to display the photo bubble. The bubble contains the photo image, sequence number, date, and a caption if the presentation author has created one. If the author has specified one, there is also a link to a web page with more information about the presentation. You can click on the image to see an enlarged version. Finally, you can fly to picture's location by double clicking on the photo icon.
The second item in the folder is a camera icon and a link to a camera information display bubble. It contains the latitude, longitude, altitude, and other shooting information.
Viewing "Hidden" Pictures
To reduce clutter and improve performance, the presentation author can choose to "hide" some pictures. Technically, a hidden picture is stored in a separate file called a Network Link. Hidden pictures are not loaded until you zoom in close to their location. To show a hidden photo, double click on its folder label. The map will zoom in to the photo location and the hidden picture icons will appear in the list. The list contains prompting text that reminds you what to do. "Hidden" photo icons start out as fuzzy spheres on the map until you mouse over them. Then they change to normal photo icons. When you zoom out, the hidden photo icons disappear from the map.